Pinterest Automatic Plugin automatically pins your WordPress posts to Pinterest saving lot’s of time doing pining work manually. Pinterest Automatic runs on your server so it uses the same server IP to connect to Pinterest.
Sometimes your server IP may be blocked by Pinterest due to service abuse using your IP especially if you are on a shared hosting where your server IP is shared among all users on the server. Some evil scripts do brute force attacks on Pinterest and this makes Pinterest take the action.
Fortunately, even if your server IP is blacklisted from Pinterest you can still use the plugin to auto-pin WordPress images to Pinterest as it supports using proxies
In this tutorial, we will see how to use private proxies from InstantProxy service. It provides reliable private proxies that are tested to work with Pinterest for as low as $10 a month.
How to know we are blacklisted on Pinterest?
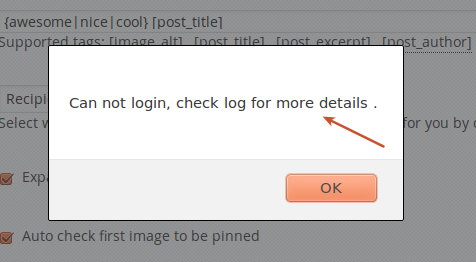
once you try to fetch boards and you are sure that you added your correct username and password and the plugin told you that the login failed, Go to check your log you should find a message like this that tells you that you must use proxies.
Pinterest Login fail
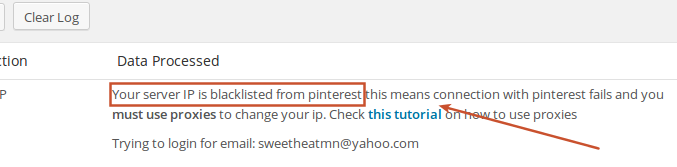
Pinterest blocked server IP
How to get private proxies from InstantProxies?
1- Visit this link and subscribe to the Package you like (the lowest package is sufficient)
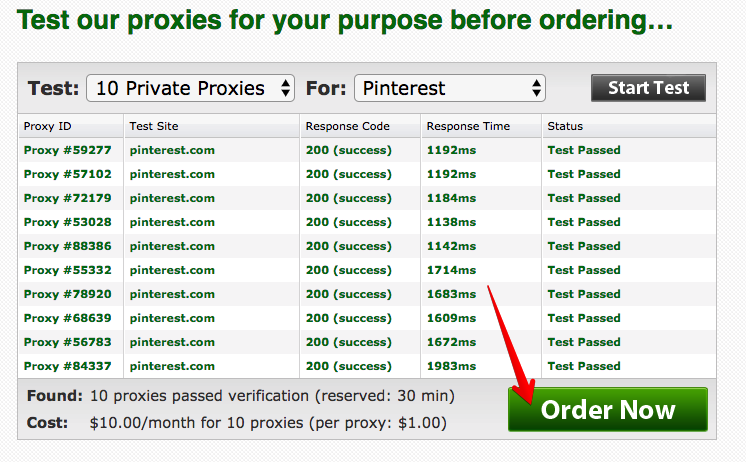
Make sure to select Pinterest as the purpose and click the “TEST NOW” button

2- It will start testing the proxies, click the “Order” button after it completes the testing job
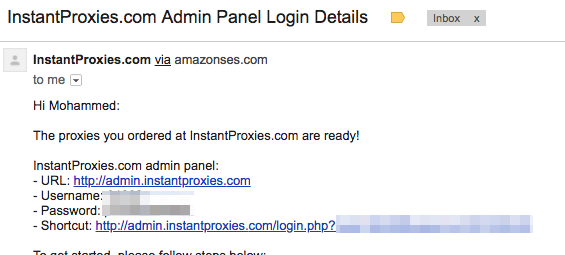
3- once you are subscribed, an email will be sent to your mail containing the service login details. Follow the login link and log in
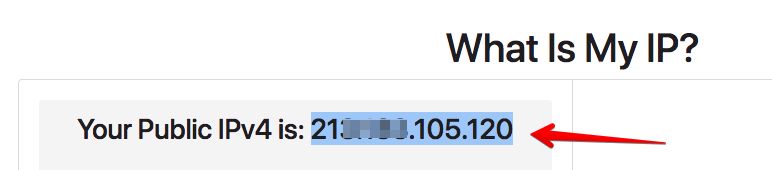
4- This service requires your server IP for authentication purpose so return to the plugin settings page and click on this link to know it.
Just copy the IP address that is displayed on the left
`
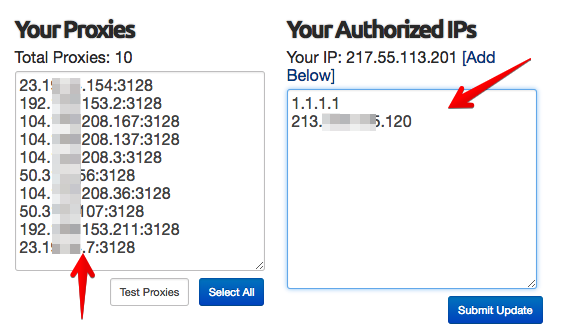
5- Paste your server IP to the Authorized IPs box and hit the “Submit Update” button
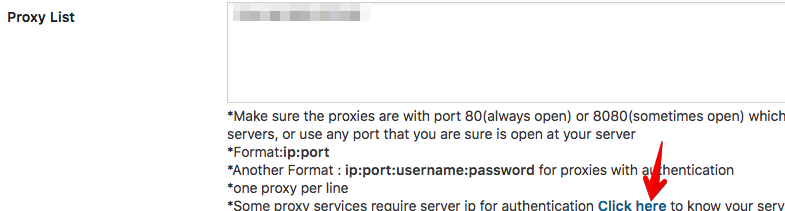
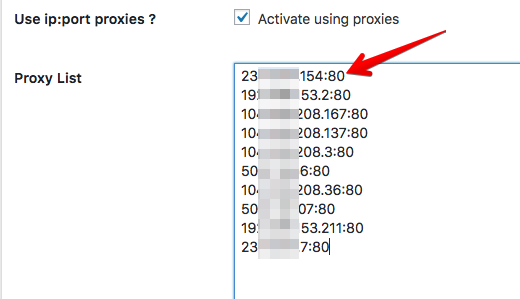
6- Paste the Proxies list to the plugin proxies option and change the port from 3128 to 80
7- Did you change the ports from 3128 to 80 ?. If not, please do change them
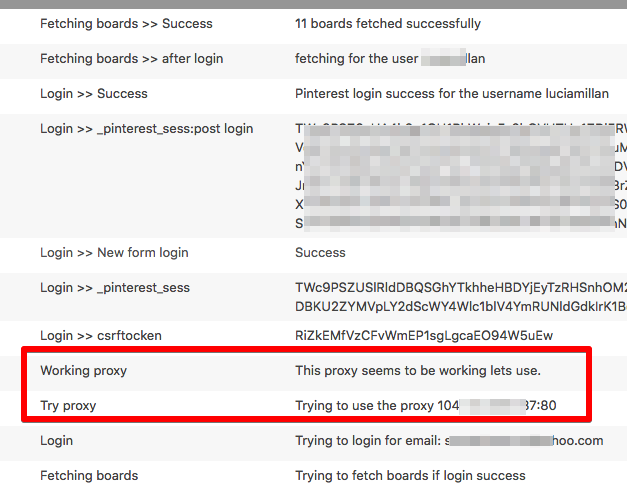
8- Now wait for 5 minutes and try to fetch the boards again. If everything was setup correctly, the boards should be fetched and the log records will be displayed as below